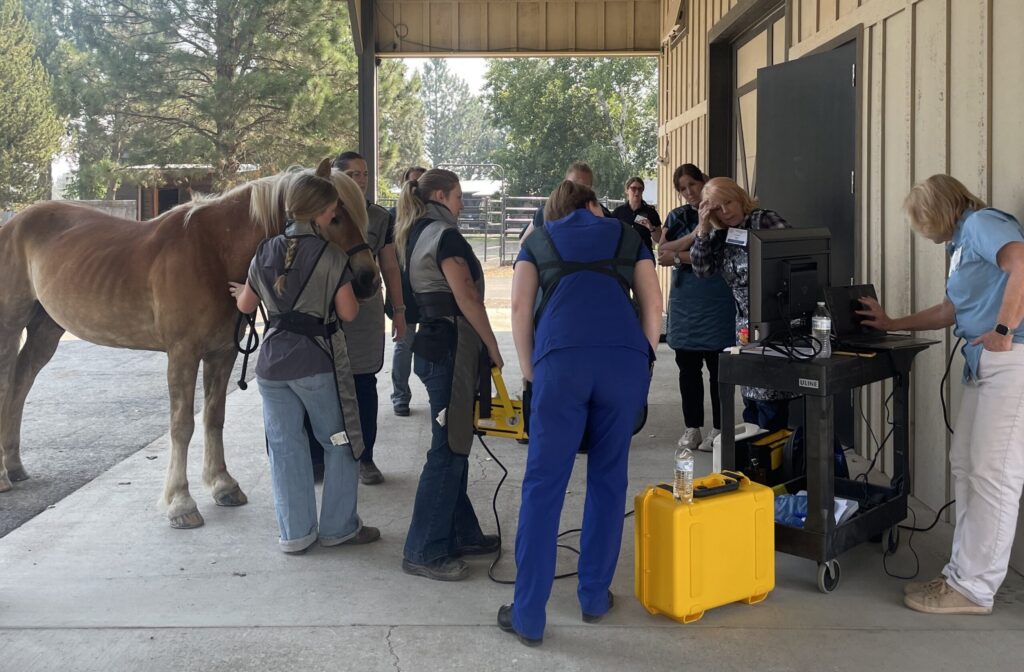
Radiography—using X-rays to assess bones, joints, and some soft tissue structures—can be an essential skill for equine veterinary technicians and assistants, but developing confidence and consistency with the technology takes practice. At the American Association of Equine Veterinary Technicians and Assistants’ 2026 Summer Imaging Event at Black Diamond Equine Veterinary Clinic, in Redmond, Oregon, Sheri Miller, LVT, VTS-EVN, of Rood & Riddle Equine Hospital, explained why strong radiography skills can elevate a technician’s role on the veterinary team, how to build those skills, and techniques for producing high-quality diagnostic images.
“Radiography can be a technician-driven job,” she said, adding that by taking on that responsibility, “you can really increase the efficiency of the people you work for, you can gain credibility, and you can be the leader of the radiographic team if you choose to elevate yourself and do that.”
At Rood & Riddle, Miller, Amber Brandt, LVT, and another assistant perform all the radiography without veterinary oversight.
“We do it all on our own,” she explained. “We have a workflow that we follow every day. We’re very efficient, and we do everything in the same order every time. That way, we don’t forget anything.”
Patient Preparation
Proper patient preparation lays the foundation for efficient, diagnostic-quality radiographs. Miller emphasized that safety comes first, both for the horse and the people handling it.
Lead protection is standard, and the equipment has evolved. “BLOXR (lead alternative) gowns are pretty popular because they’re lightweight and you can throw them in the washer (not the dryer),” Miller said.
She reminded attendees to hold the detector at arm’s length, never in front of their body. “The detector does not stop the radiation,” she said. “A fair amount of radiation goes straight through that plate.”
Before getting started, verify the patient’s identity. “We work with a lot of brown Thoroughbreds,” Miller said. “They all look a lot alike.”
Verifying identity before radiographing prevents images from being filed under the wrong patient record, which she noted can be a hassle to correct after the fact.
Basic physical preparation follows: brushing the legs, picking out the feet, and removing debris or anything that could create an artifact on the image.
Proper restraint, including chemical restraint when appropriate, is essential to protect both the horse and the team. Miller, who works extensively with Thoroughbreds, racehorses, yearlings, and young horses, said sedation decisions are rarely left to chance: “Sedation is key to what we do … we want to protect our people, our equipment, and a lot of times it’s going to allow you to take less exposure.”
Patient positioning is another challenge to consider. A sedated horse naturally wants to lean and balance itself, but the goal is to get all four limbs standing perpendicular to the floor, “like a 4H horse,” said Miller. She acknowledged that perfect positioning isn’t always possible, because many horses have some degree of rotation in their limbs, but it’s worth the extra time to position the legs correctly.
“It’s a tricky game trying to change your radiographic technique for a horse that’s standing poorly,” said Miller. “I would rather just take my time and move the legs.”
Handler awareness is also critical. Miller stressed that someone should always have a hold of the horse’s head before anyone approaches to reposition a limb, because sedated horses can bite quickly. “Your handler can make the whole difference in the game,” she said.
Image Quality
Producing a usable radiograph is about more than pointing a machine at a limb. It requires a sharp, properly exposed image that clearly shows the anatomy in question. Miller shared several factors that determine image quality.
Keeping exposure time low reduces the risk of motion artifact, particularly on the distal limb where horses might shift or sway even under sedation. “If you have your technique at the right number so that you can have your mAs low, you’re probably going to get a nice sharp shot even if there’s a little bit of motion,” Miller explained. Larger body parts, such as stifles, require greater technique—and therefore more time—to produce a good image.
Beam alignment is another key factor. The beam from the generator should strike the detector at a 90-degree angle. If the plate isn’t aligned properly, the resulting image will be an inaccurate representation of the anatomy.
Collimation should be set just inside the border of the detector, similar to a picture frame. Miller warned against opening the collimator too wide: “That is spreading the radiation all around. That’s going to include your handler’s hands and body and the horse’s legs.” She recommended calibrating (collimating) the light field to fill the detector at a set focal-film distance (roughly 26 to 28 inches), so technicians can rely on consistent positioning rather than measuring for every shot.
Distance also affects contrast. Getting too close intensifies the radiation and produces a starker, more black-and-white image. The goal, Miller said, is balance: “Black and white is good for bone, shades of gray are good for soft tissue. We want the perfect balance of all that on all of our shots.”
She also reviewed positioning of the cassette:
- The cassette should be as close to the area being radiographed as possible.
- The cassette should be perpendicular to radiographic beam whenever possible.
Placing the cassette too far away magnifies the image and distorts the true size of the anatomy. Failing to keep it perpendicular causes uneven magnification across the image, with parts of the limb appearing larger or smaller than they are.
Key Terms and Positioning
Miller reviewed the standard directional terminology used from the knee and hock down, which can help vets and technicians communicate about and execute radiographic views:
- Dorsal: aspect of the distal limb in the direction of the head
- Palmar/plantar: aspect of the distal limb in the direction of the tail
- Lateral: aspect away from the middle of the body
- Medial: aspect toward the middle of the body
- Proximal: situated toward the point of attachment of the limb
- Distal: situated away from the point of attachment of the limb
- Axial: toward the axis of the limb
- Abaxial: away from the axis of the limb
These terms describe the direction the beam travels. For example, a dorsal-to-palmar (DP) projection sends the beam from the front of the limb through to the back, superimposing the dorsal and palmar structures on the resulting image. Combined with lateral and medial views, and the oblique views that fall between them, technicians can capture eight reference points around a limb across four radiographs.
“That’s why four views of a fetlock is pretty good,” Miller said. “We’re going to see all of the areas around here that we need to see. But each image is going to highlight different areas. That’s why each one has its own significance.” Depending on the case, she noted, five or six views might be necessary.
Miller also described the sagittal plane, an imaginary line splitting the limb front-to-back down the middle, which serves as a reference point for marker placement and for terms like axial and abaxial. The sesamoid bones, for instance, have both axial surfaces (toward the center of the body) and abaxial surfaces (away from the center of the body).
In summary, said Miller, these views are designed to capture the areas of the limb where lesions most commonly occur, giving technicians a consistent, clinically grounded basis for every radiographic series.
Take-Home Message
Radiography skills can increase a veterinary technician’s worth in a practice and make them more employable and versatile, said Miller. She had three key takeaways for attendees:
- Safety and positioning are technician-driven skills.
- Consistent technique and workflow improve efficiency.
- Quality assurance supports patient care and regulatory compliance.
“Veterinarians want their job to be made easier, and that’s one way we can really up your value,” Miller said. “We want you to be the tech that people want to work with.”
Related Reading
- Understanding the Distinctions Between Veterinary Technician Roles in Equine Practice
- Maximizing Veterinary Technician Utilization in Equine Practice
- The Business of Practice: Utilizing Licensed Veterinary Technicians
Stay in the know! Sign up for EquiManagement’s FREE weekly newsletters to get the latest equine research, disease alerts, and vet practice updates delivered straight to your inbox.